 arpato
Logitech MX Master 4: Actions Ring, haptics and one-press screenshots
MX Master 4 is Logitech’s first mouse with haptic feedback and an action ring under the thumb. We put it to work together with the MX Keys S keyboard and our app arpato Kadr: screenshots, GIFs and screen video in one press, and the mouse confirms every action with a light tap.
What is new in MX Master 4
The headline feature of MX Master 4 is the haptic panel under the thumb (Logitech calls it the Haptic Sense Panel). It is both a button and a vibration motor: a press opens the Actions Ring — a ring of quick actions around the cursor — and a vibration confirms that an action worked.
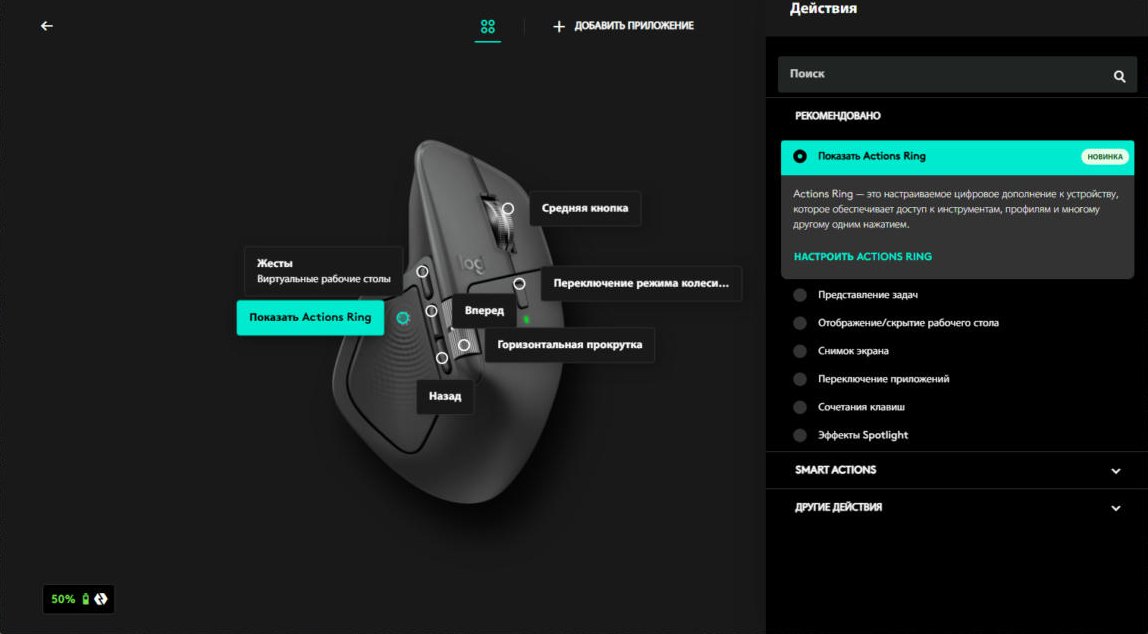
In Logi Options+ this button is called “Show Actions Ring” by default. The other buttons are still there: gestures, back and forward, horizontal scrolling and the wheel mode switch.
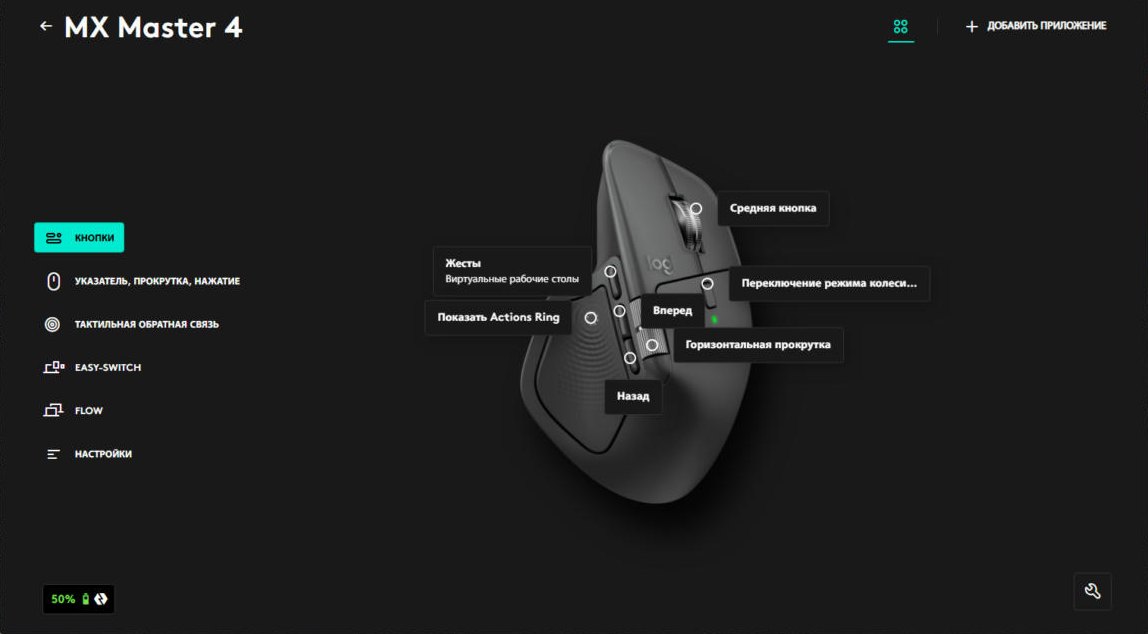
Actions Ring: what goes in the ring
You can put anything in the ring: apps, keyboard shortcuts, media keys and plugin actions. We added the Kadr folder: area capture, full screen, video, GIF, stop, sound, resolution, the screenshot folder and settings. Everything for screenshots and screen recording is one thumb press away — no hotkeys to remember.
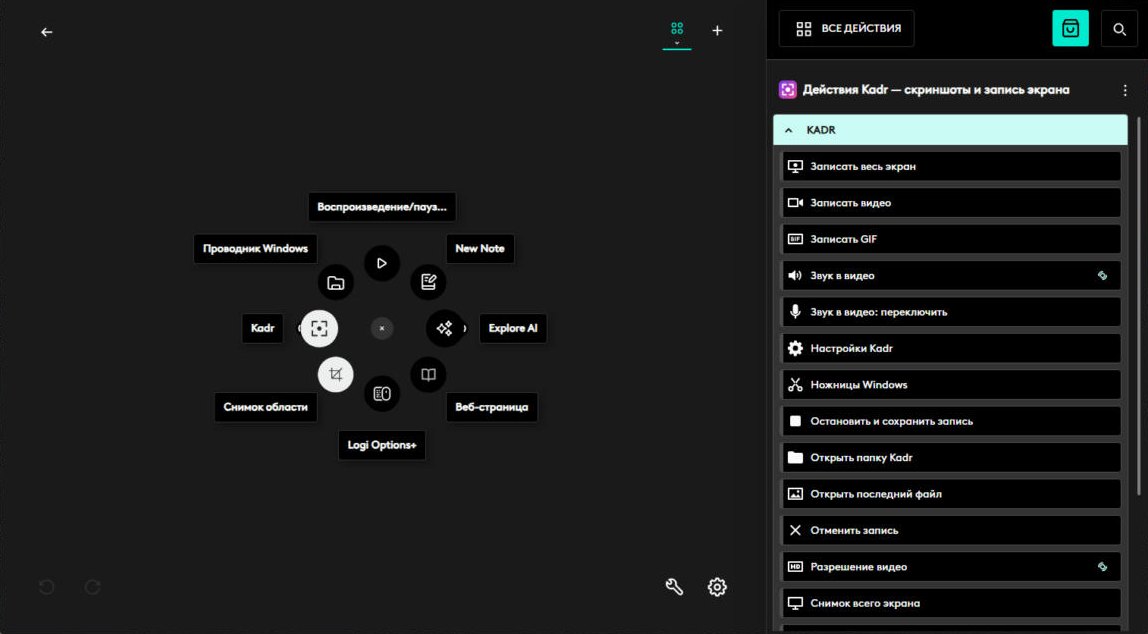
The plugin’s actions are listed in Logi Options+ under “All actions” → “Kadr — screenshots and screen recording”, in three groups: Kadr, Kadr · Sound and Kadr · Resolution. Drag any of them into the ring or assign it to a regular mouse button or key.
Set it up in three minutes
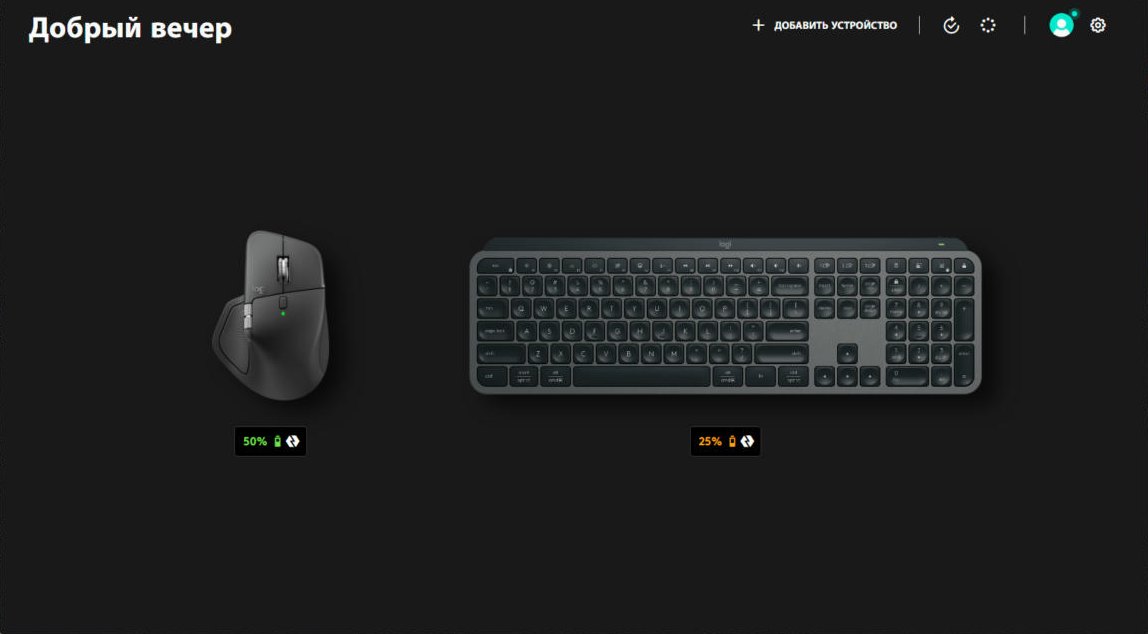
- Install Logi Options+ and connect MX Master 4 and MX Keys S.
- Install arpato Kadr. In the installer keep “Install the Kadr plugin for Logi Options+” and “Add a Kadr folder to the Actions Ring” checked.
- Open Logi Options+ → MX Master 4 → “Buttons” and check that the thumb button is set to “Show Actions Ring”.
- Press the button — the Kadr folder is in the ring. Choose “Area capture” and select part of the screen.
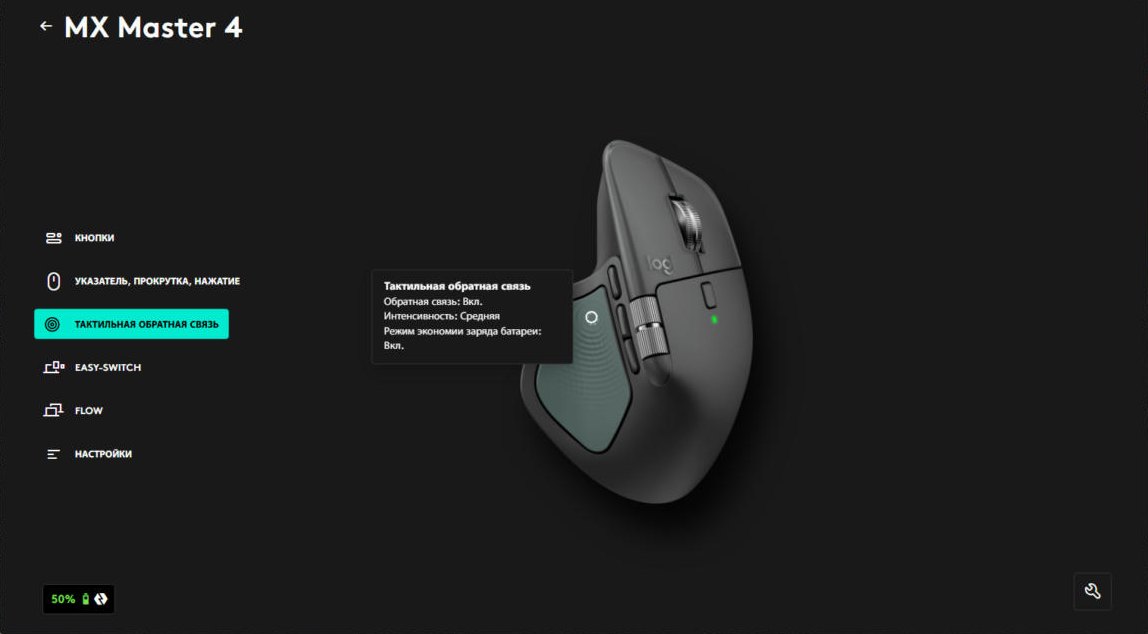
Haptics: the mouse confirms every action
Kadr tells the mouse about events, and MX Master 4 answers with a light tap. No need to look at the screen — your thumb feels that the screenshot is taken or recording has started. It vibrates when:
- a screenshot is saved or copied to the clipboard;
- video or GIF recording starts;
- recording stops and when the file is saved;
- recording is cancelled without saving;
- video sound or resolution changes;
- something goes wrong.
Live icons and dials
The ring icons follow the state: “Record video” turns into “Stop recording” while recording, and the sound and resolution icons show the current choice — microphone, system sound or both, from 480p to 4K. For Logi wheels and dials there are adjustments: turning picks an option, pressing resets it.
MX Keys S: the Screen key opens Kadr
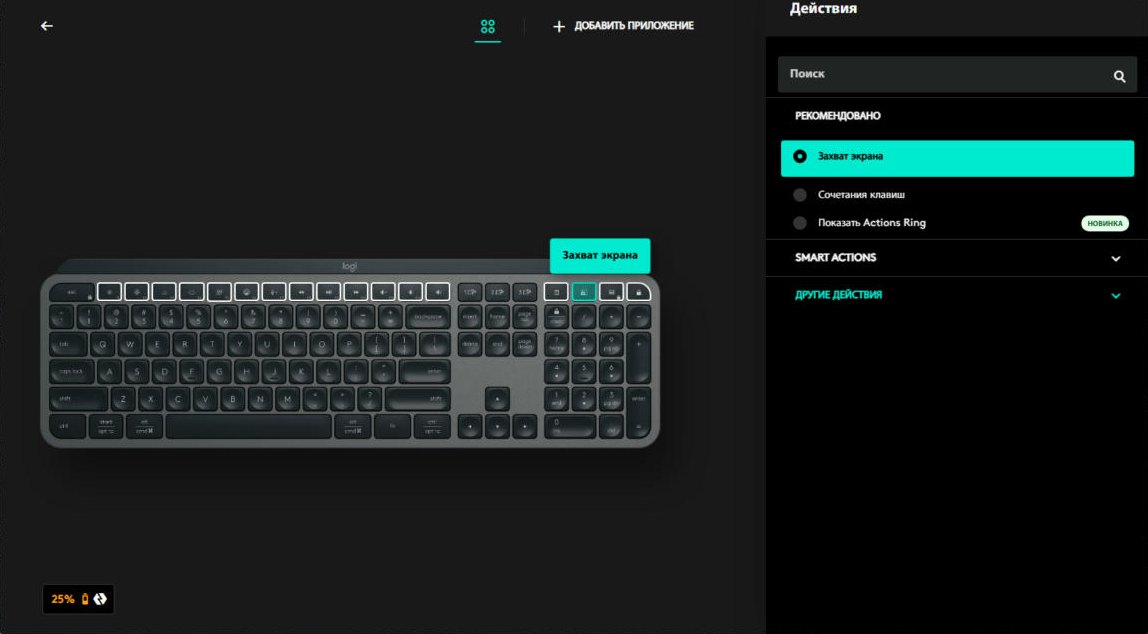
MX Keys S has a dedicated screen capture key. In Logi Options+ it should be set to “Screen capture” — then it opens Kadr instead of the Windows Snipping Tool. If the key was reassigned before, the Kadr installer sets “Screen capture” back by itself. The familiar Print Screen, Win+Shift+S and Win+Shift+R open Kadr too — on any keyboard.
Three everyday scenarios
- A screenshot for a chat. Thumb button → “Area capture” → select → Enter. The screenshot is already on the clipboard, paste it with Ctrl+V.
- A video tutorial. “Record video” in the ring, select a window, talk into the microphone. Press again to stop; a vibration confirms the file is saved.
- A GIF for a bug report. “Record GIF”, show the problem, stop — the file is in the Kadr folder, and “Open the last file” in the ring shows it right away.
Questions and answers
Do I need Logi Options+?
Yes, the plugin runs inside Logi Options+. arpato Kadr itself works without it: Print Screen and the hotkeys open it with any keyboard and any mouse.
Will it work with MX Master 3S or another mouse?
The Actions Ring can be opened with a button of any mouse or keyboard supported by Logi Options+ — “Show Actions Ring” is in the action list. Haptics are MX Master 4 only.
Is it free?
Yes. arpato Kadr is free, and so is Logi Options+.
The Screen key opens Snipping Tool, not Kadr. What should I do?
Check in Logi Options+ that the key is set to “Screen capture” and that Kadr is the default screenshot tool in Kadr’s settings. You can also simply install Kadr over itself — the installer restores the assignment.